Switching providers can be a pain especially if you have everything setup the way you like it on your VPS. You spent hours tweaking everything and getting it working just right but now for some reason, you need to change hosts. Or you’re just not happy with the service level you’re getting. But what if I told you there was a way to migrate the whole thing? I mean, the entire VPS?
Warning/Disclaimer/Read this first: This method should only be used in extreme cases and if you really have no other choice. It’s extremely bandwidth heavy, your host will probably notice, and if you don’t have enough monthly bandwidth it will consume it. Just a fair warning! Also, this really only works for moving a KVM VPS. If you’re using OpenVZ or LXC, then you’re better off backing up and migrating your data as containers don’t really migrate nicely with this method. Also, I didn’t test this with a Windows VPS. It should work, but Windows is a whole other beast and your mileage may vary. Plus, Windows VPSes are usually licensed to your hosting provider. Moving a Windows OS will definitely invalidate the license which could cause other problems.
Packing your bags – the Linux way
If you’ve been in a bad relationship before, you probably have thought about packing up as much of your stuff as you can carry, throwing it in your car, and driving as far away as fast as you can. This method is similar! It’s like packing up your entire apartment and taking it with you. And it’s made possible by our good Linux friend dd or Copy and Convert (yes, this is what it actually stands for – not “data duplicator” nor “disk duplicator” or even “disk dump”… even though it’s used for all those things and more!). But before we get here, we need to pack up our bags.
First, you need a new place to live
This seems kind of obvious, but you need somewhere to put your VPS. This should be your new hosting provider (need a VPS, by the way?). Your new VPS disk should be the same size or larger than your existing VPS disk. We never recommend trying to downsize a disk. If you need to go smaller, it’s best to start from scratch.
Deciding to maybe bring things “in house”? This will also work with migrating a VPS to your own Proxmox VE private cloud. You’ll just need to create a VM with the same disk size or larger as your VPS. CPU and RAM doesn’t really matter, but it’s always good to try to make it identical.
Packing it all up
Unlike packing your home, it’s a lot easier to pack up an entire virtual system. To do this, you’ll need to take your VPS offline. This is to make sure no data gets corrupted or missing in transit. It also makes sure our OS stays safe and bootable. So if you’re hosting a website or service on your VPS, make sure you let your users know it’s going to be down for a while.
You’ll want to boot your VPS into rescue mode. Most VPS providers offer a rescue environment that is usually nothing more than a lightweight Linux distro (usually Debian), and it contains just enough to help you fix your system. It does usually require some command line knowledge, but I’ll help you out.
If your provider does not offer a rescue environment, try seeing if they will let you run an ISO directly or can make an ISO available to you. Preferably systemrescuecd. This is a lightweight Linux distro that has both a CLI and GUI to help you repair your system.
Depending on your provider and what control panel they use will determine how you can get your system into rescue mode. Here’s screenshots from a couple different panels:
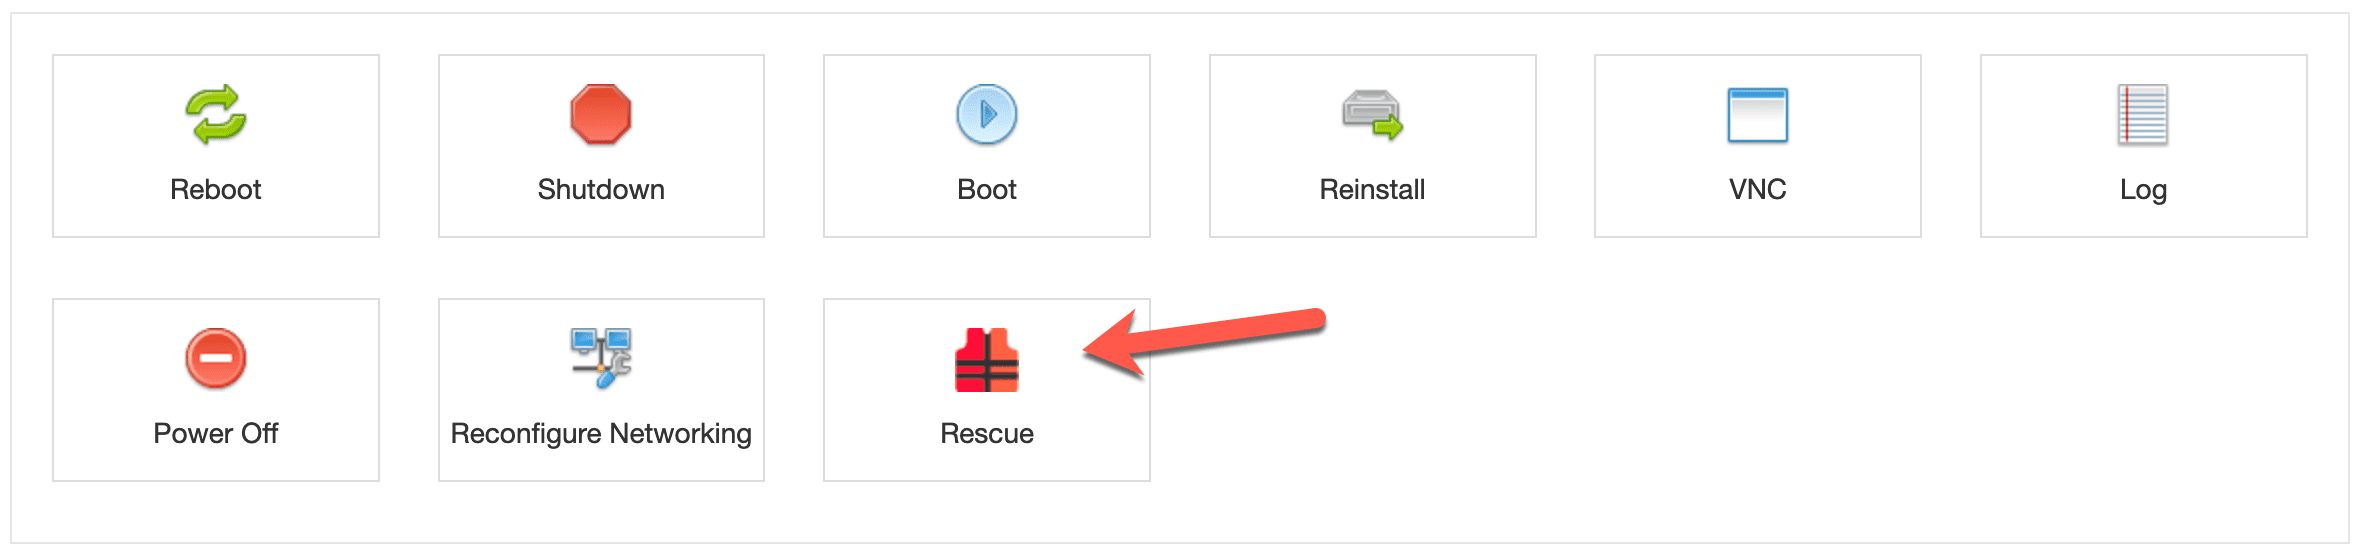
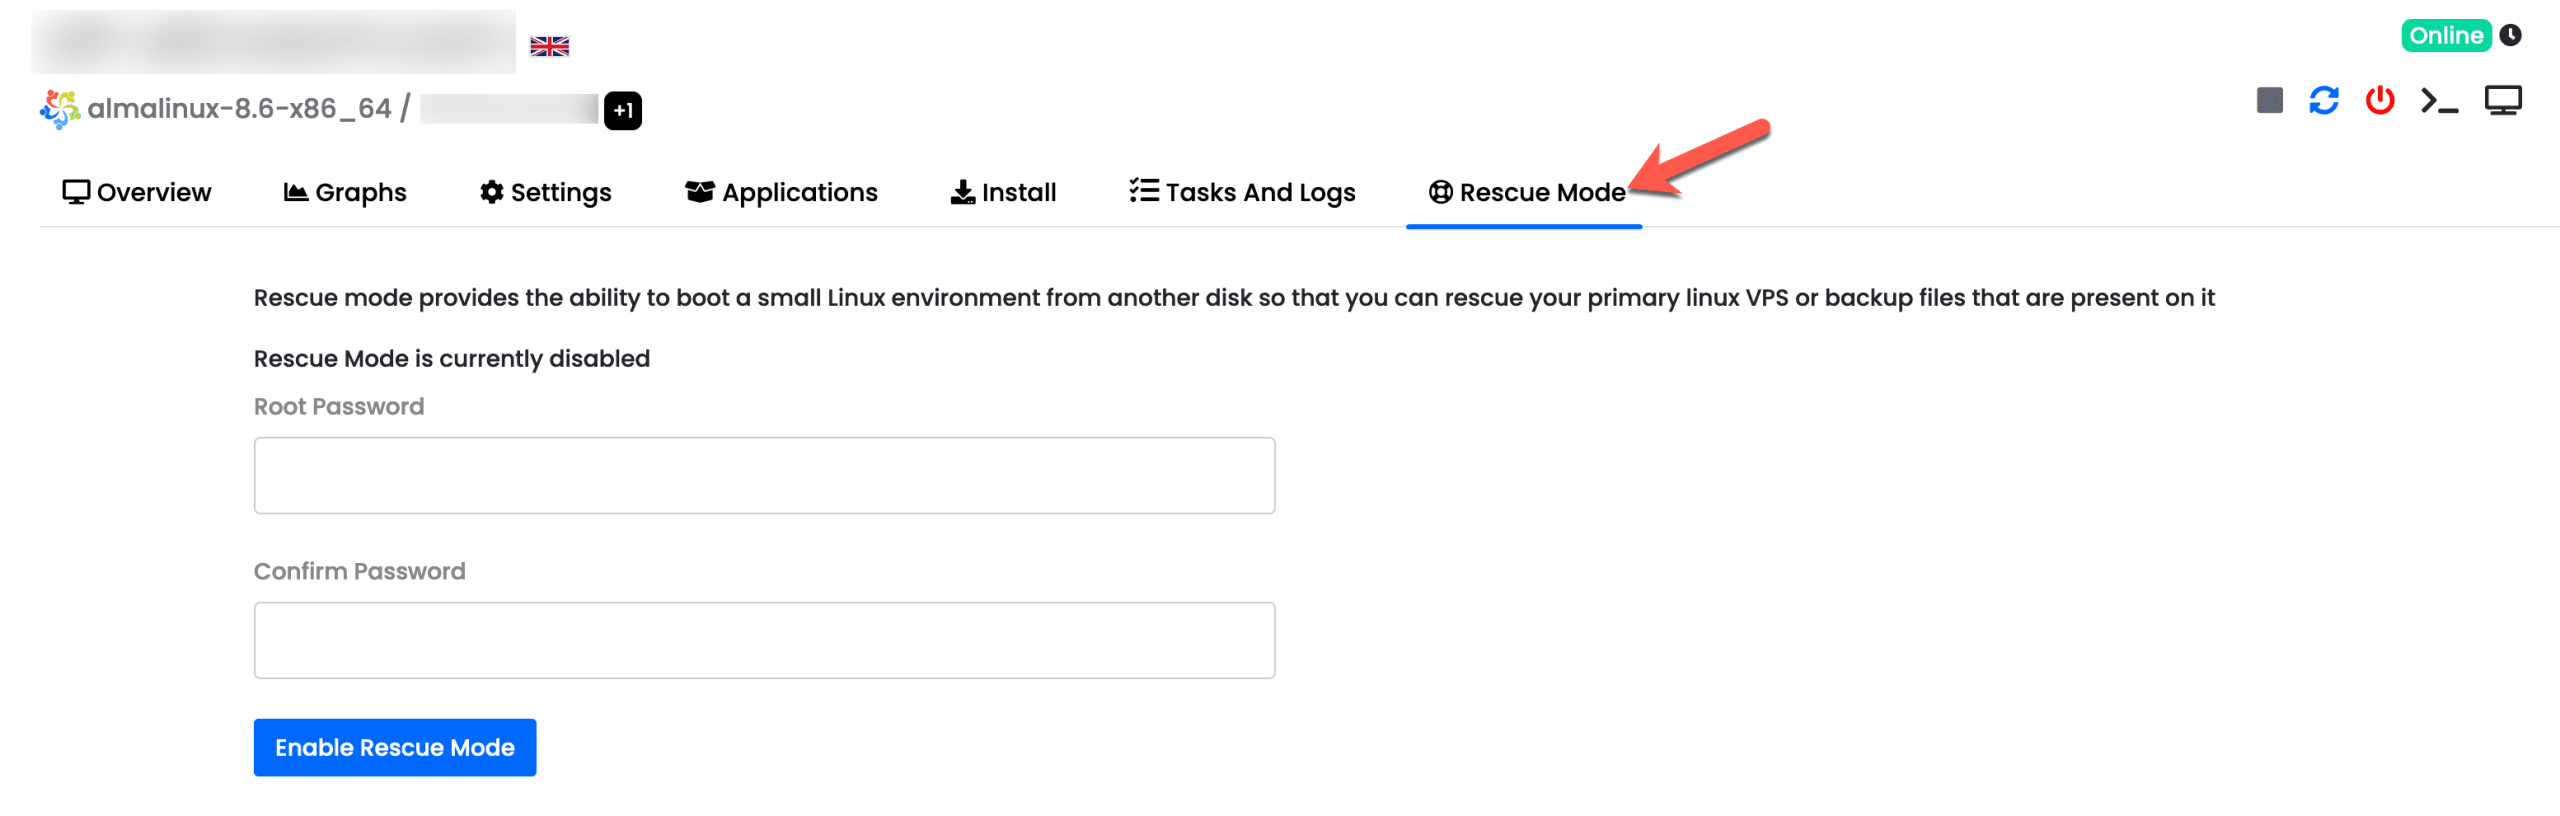
You can see that both are very similar. However, one will let you pick your password, the other will provide you your SSH information – so again, this varies.
And sometimes, if you have a VNC console available to you, it should also work for you to work in rescue mode.

Go ahead and put your old VPS as well as your new VPS into rescue mode. If your new provider has already provisioned an OS for you, it’s going to get erased.
On your old VPS, issue the command lsblk and press enter. This will show you your disks and partitions. On a standard VPS it should look something like this and you want to see something like the arrow is pointing to:

You can see here that we show 3 disks: sr0 which is the virtual CD-ROM, vda (with partitions vda1 and vda2) and vdb (with partition vdb1). vdb is the rescue environment, so we’re going to make a note of vda. Do the same thing on your new VPS. Depending on provider and hypervisor, you may see vda or sda. In my example, I’m going from a KVM VPS on an AlmaLinux host to a KVM VPS on a Proxmox host so my source VPS uses vda, my destination VPS uses sda. Also make sure the size is the same!
IP-Haul, moving data one frame at a time
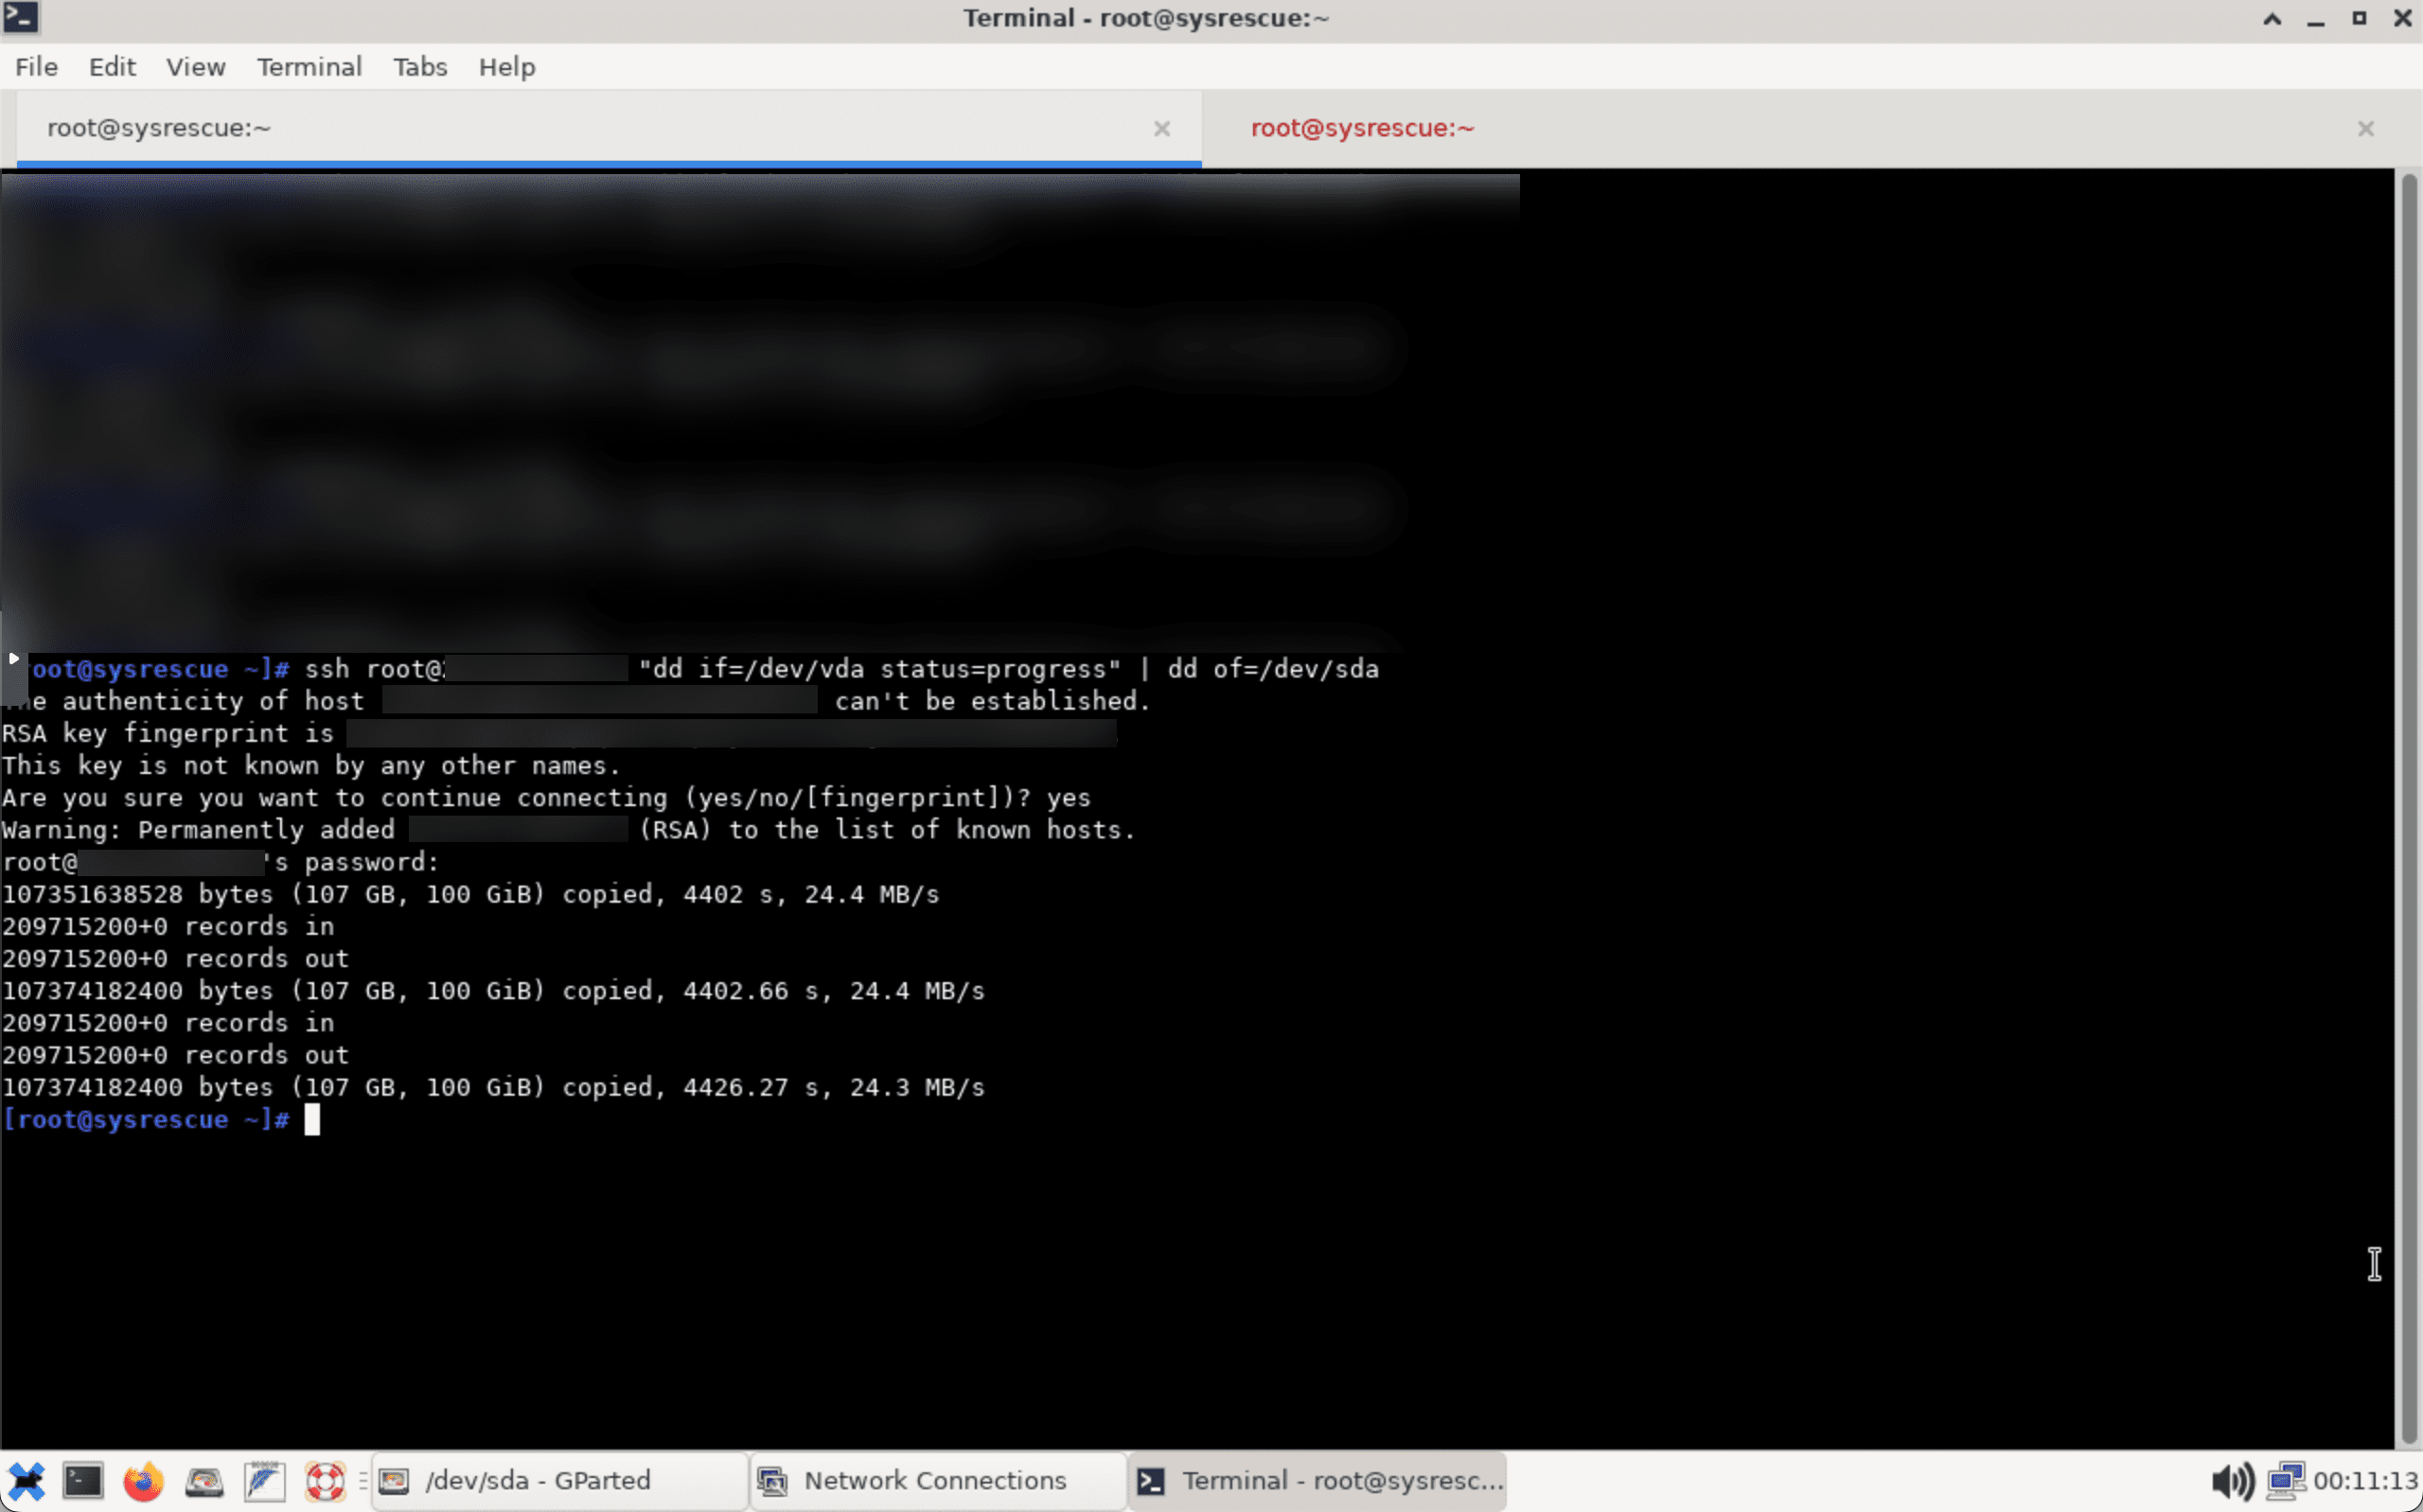
Now that both VPSes are in rescue mode, login to your new VPS or the VPS you’re transferring everything to. Type in the following command:
ssh root@<YOUR-OLD-IP> "dd if=/dev/vda status=progress" | dd of=/dev/sda
When you press enter, you should be prompted to accept the SSH fingerprint and type in the root password. This is where you’ll find out if there’s something slowing you down too or if either host cuts you off.
dd is going to copy the entire disk and all partitions to your new VPS and overwrite all partitions. This will make sure you have everything from the bootloader to your data.
Depending on the size and network speed, it could take an hour or longer. My 100 GB VPS took 4402 seconds to copy, or 73.3 minutes. Or 1 hour, 13 minutes.
Here’s what it looked like on the receiving end (I was using systemrescuecd in the Proxmox console):
Once everything is copied, it’s time to take your new VPS out of rescue mode – and hold your breath!
The first post-move boot
I’m going to warn you that this is where things are going to go wrong. First, your VPS probably has the old IP still in it. So stay connected to VNC (or reconnect if it boots you). Watch the boot up process. Make sure it loads to a login screen. At which point you can now login and adjust your network settings. Once that’s done, test and make sure everything is working and then swing your DNS over. Once everything is good, cancel your old VPS.
If that’s all good, congratulations! You’re now a few gigs into your bandwidth, but you didn’t have to do any hard work.

I mentioned it was bandwidth intensive, right?