Linux is not new – it was first announced August 25, 1991 by Linus Torvalds. You might know of this email as “The Famous Email”. If you haven’t read this message, we’ve included it here for you to read:
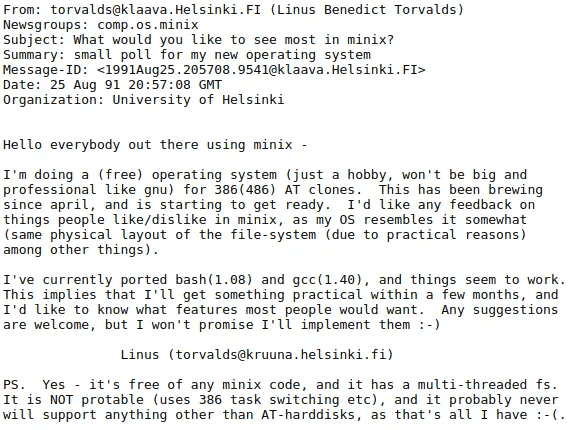
You just have to chuckle at “just a hobby, won’t be big” and “it probably never will support anything other than AT-harddisks”. Linux has definitely come a long way since 1991. We wouldn’t have jobs without it!
Learning Linux by doing
I got my start in web hosting all because of my love of Linux. I was able to do things with it that I couldn’t easily do in Windows. At NodeSpace, I want to help others learn about Linux and to learn valuable skills. We can always use talented Linux administrators and so can many other companies. We’re going to be doing a series of blog posts that will help you get the spirit of Linux. The title of this series is a little nod to the distro of Linux we’re going to be using called AlmaLinux. We’re a supporter, fans of, and an official mirror of, AlmaLinux. And if you didn’t figure it out yet, alma is Spanish for “spirit” or “soul”.
Getting setup
To get started, we’re going to need a few things. When learning something new, I like to work locally. While you can order a dedicated server or virtual cloud server from us with AlmaLinux, we recommend doing that once you’re more comfortable. When you’re learning, stuff goes wrong, problems occur, and it’s just faster and easier to fix locally. And this is an opportunity to learn about virtualization!
If you’re running macOS or Windows, you can download VirtualBox for free from https://www.virtualbox.org. We also recommend downloading the VirtualBox Extension Pack as well. We’re not going to show you how to install VirtualBox, but it’s very easy. If you need help, there are a ton of resources on YouTube that will walk you through the process, including how to check if your computer is compatible. Most modern computers are, but you just need to enable virtualization in the BIOS. Check with your computer manufacturer on how to do this.
The other thing we need is AlmaLinux. You can download an ISO from a local AlmaLinux mirror on their website or you can download an ISO from our mirror: https://mirror.nodespace.net/almalinux/8/isos/x86_64/. Our mirror is located in North Carolina.
If you’re confused as to which ISO you need, I recommend the minimal ISO which is around 1.7 GB in size. The DVD ISO contains everything. Minimal contains just enough to get a working system and we’ll install the tools that we need as we go.
Installing AlmaLinux
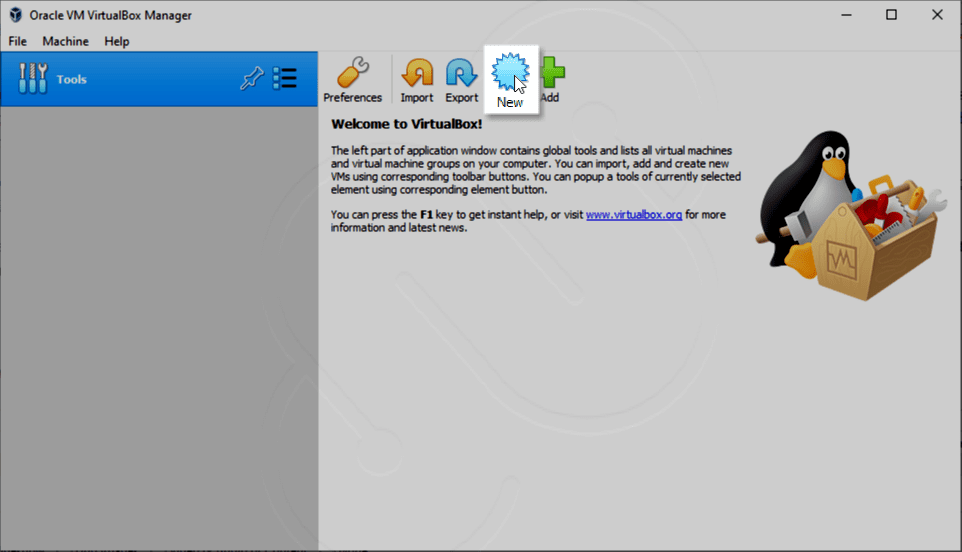
Now that you have your ISO, let’s install AlmaLinux! Launch VirtualBox and click on New.
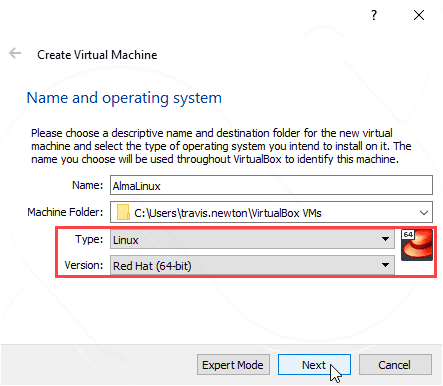
Give your virtual machine a name. I just called mine “AlmaLinux”. What is important is that you set the type to Linux, and since AlmaLinux is based on Red Hat Enterprise Linux 8, select the version as Red Hat (64-bit). Click on the Next button.
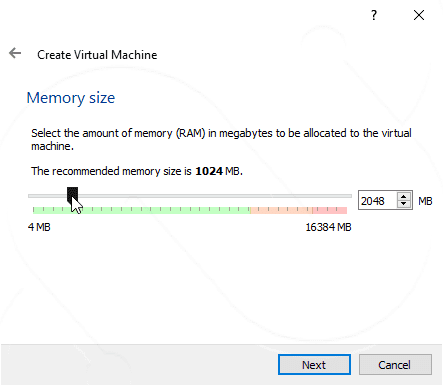
Next set the amount of RAM you want to give your virtual machine. This will depend on how much RAM you have on your computer. At the very least, I would recommend 2 GB. 4 GB is good, and 8 GB is great. But make sure you leave some RAM for your host system. Keep the slider in the green for best performance and remember that it’s best to use increments of N^2. So for example, 1 GB, 2 GB, 4 GB, 8 GB, etc. This just means don’t give your virtual machine 2411 MB of RAM, instead, give it 2048 MB (or 2 GB). Click the Next button.
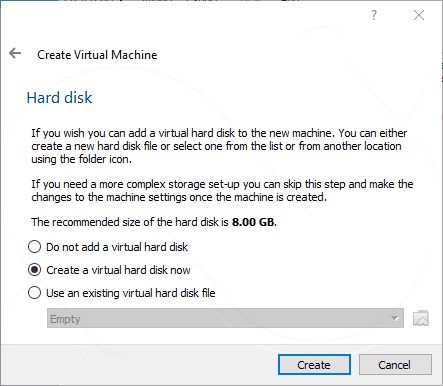
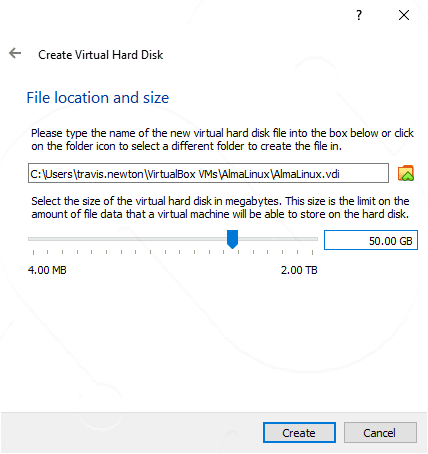
AlmaLinux won’t be any good if we don’t have a virtual hard drive to install it on. Click on Create a virtual hard disk now and then the Create button.
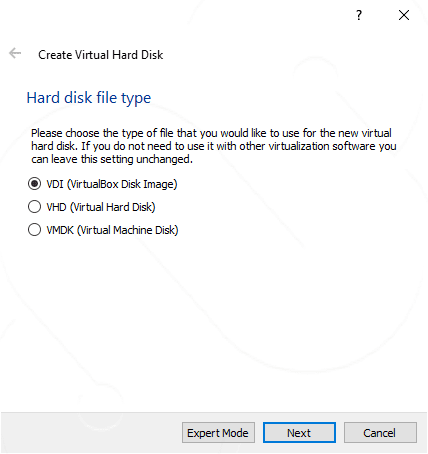
Keep the VDI option selected.
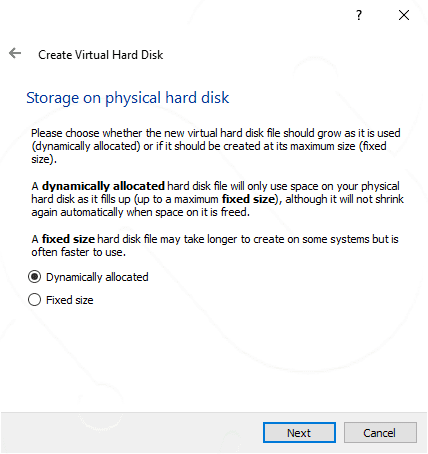
It’s very important that you keep the Dynamically Allocated option selected. This means that if you give your virtual machine 100 GB of disk, it won’t immediately consume 100 GB on your host machine. If you select Fixed Size, and set your disk to 100 GB, it will immediately consume 100 GB.
I am giving my virtual machine 50 GB. This is more than enough space and we’re not going to use all of it. Feel free to give yourself more or a little less. I would not go less than 32 GB.
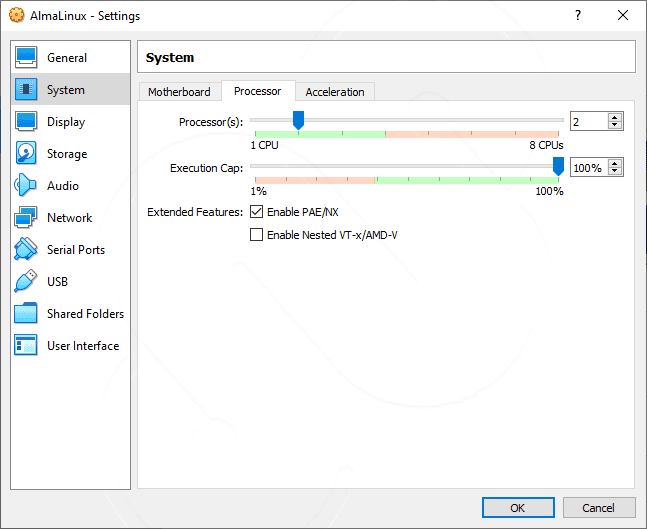
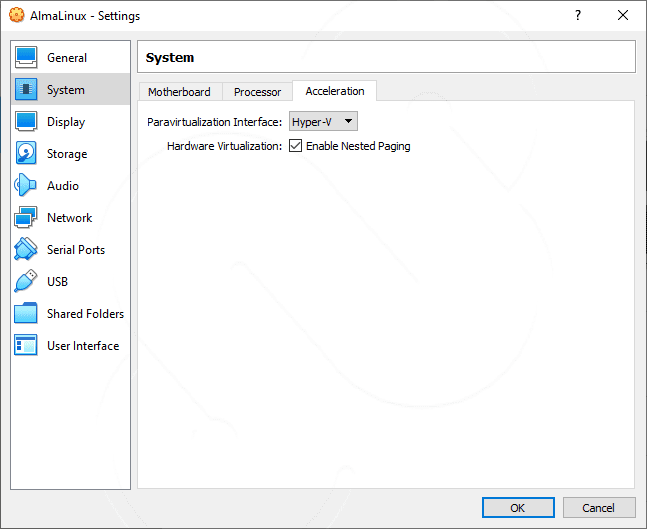
Finally, before we start installing, we need to make some adjustments. Click on Settings.
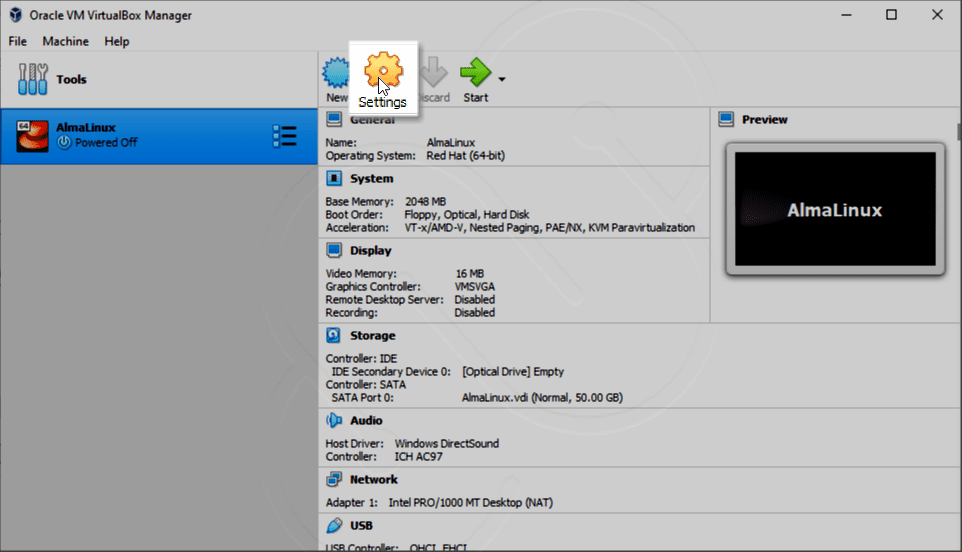
Go to System > Processor and give yourself at least 2 cores. This will make things run much smoother.
If you’re on Windows, under the Acceleration tab, set the paravirtualization to Hyper-V.
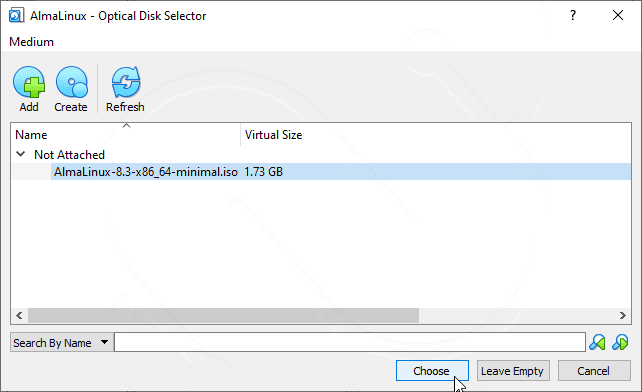
Under Storage, select your IDE controller and then Choose/Create a Virtual Optical Disk.

Click on Add and find your AlmaLinux ISO. Then select Choose.
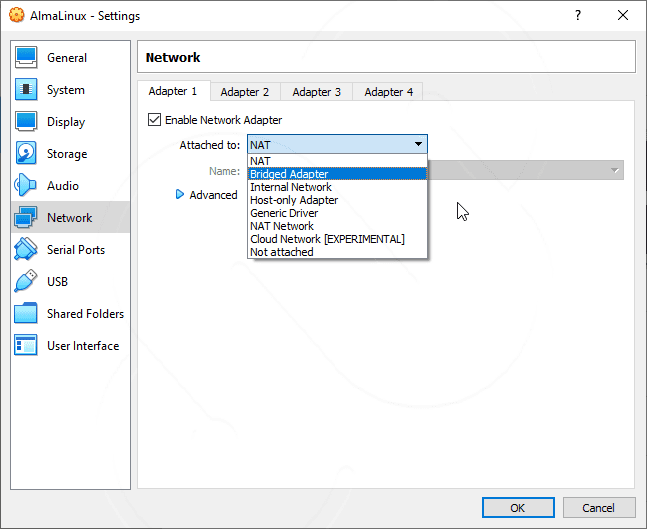
Under the Network tab, select the first network adapter and choose the Bridged Adapter option. This will place the virtual machine directly on your home network.
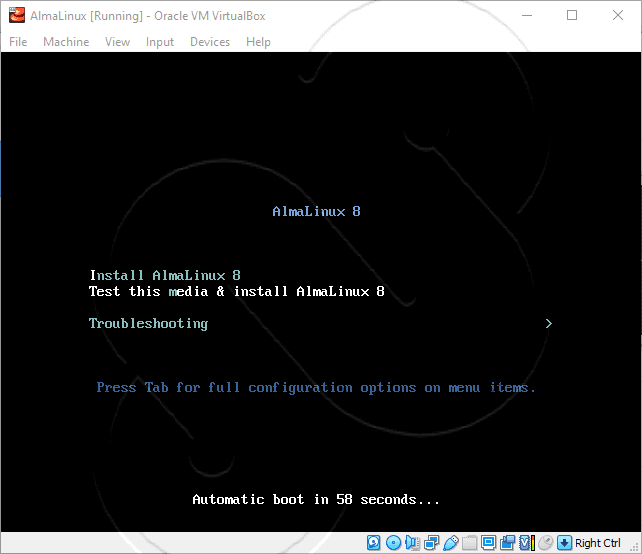
And that’s it for the settings. It’s time to start the installation process. Click the start button on the main screen and your AlmaLinux virtual machine will start booting. Select the option to install AlmaLinux 8.
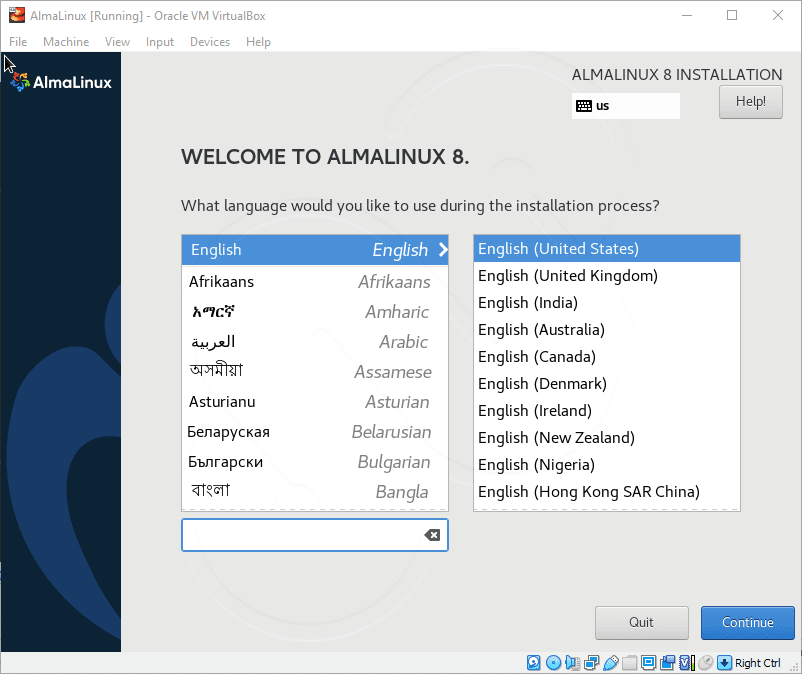
Select your language and click on continue.
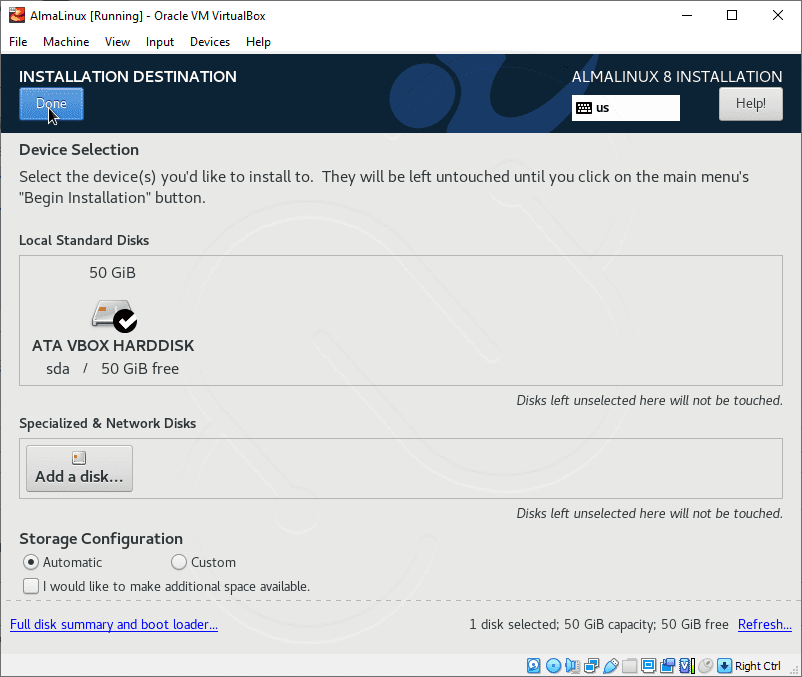
Next there are a few items we need to change. First, click on Installation Destination and then click on Done. This is to just verify we’re installing to the correct place.
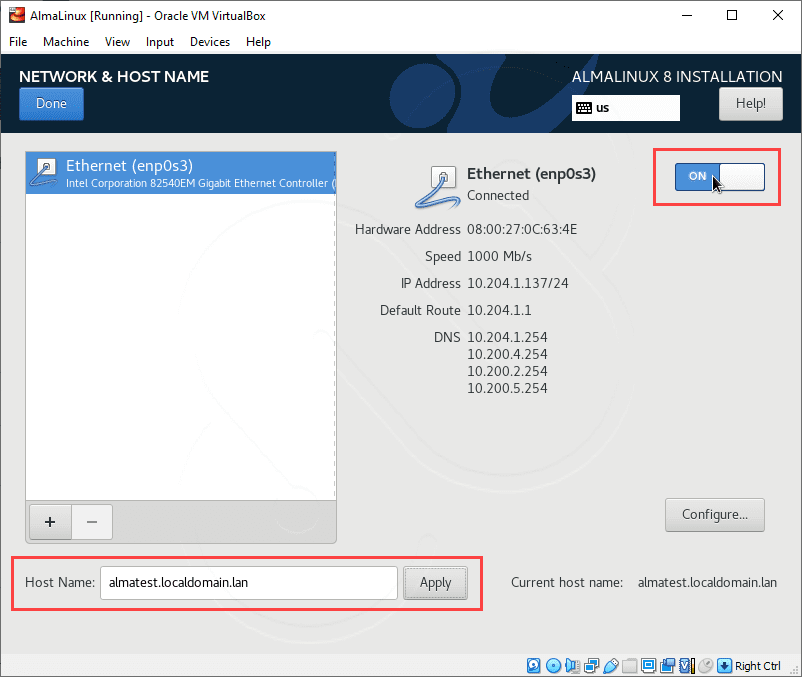
Under Network and Hostname, set a hostname for your AlmaLinux server and connect it to your network. If everything is good, you should have an IP on your home network. You can then click on Done.
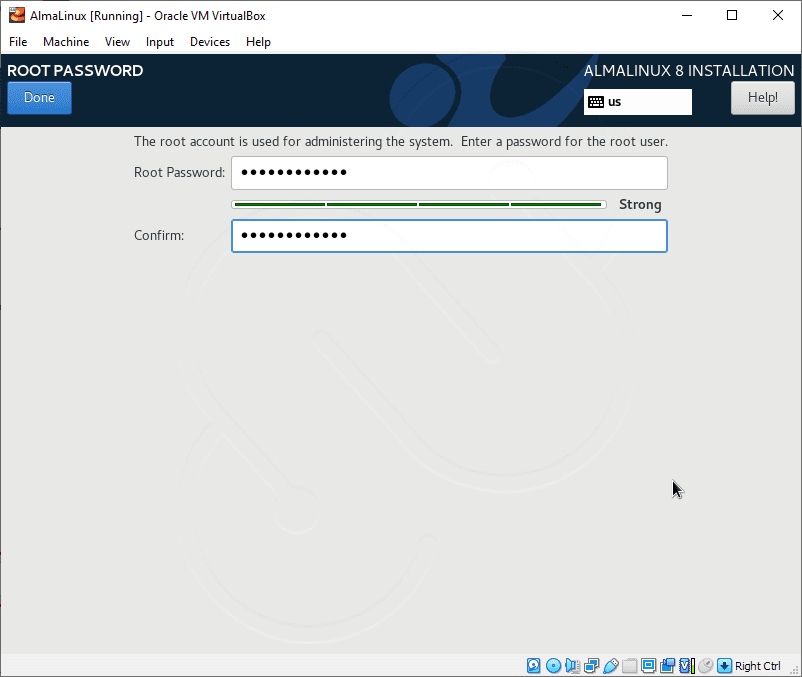
Now lets add a secure password for our root user. In Linux, root is like the Windows Administrator account. It has full access to everything. This account needs to be kept secure. If you choose a bad password, the installer will let you know.
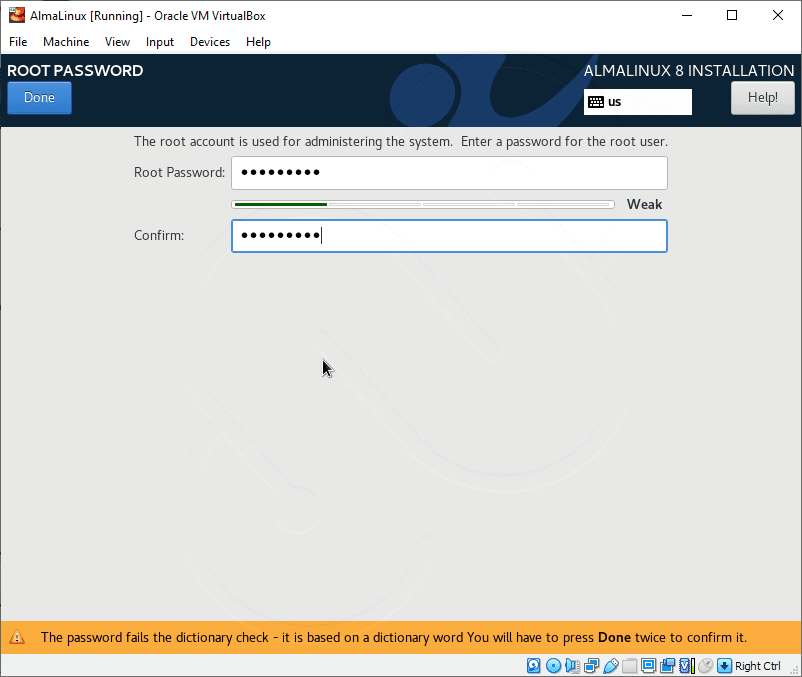
While you can still use a bad password, you have to press Done twice to acknowledge that it’s a really bad idea and that you should probably change it to something else. If you don’t see this banner, then your password is sufficiently safe.
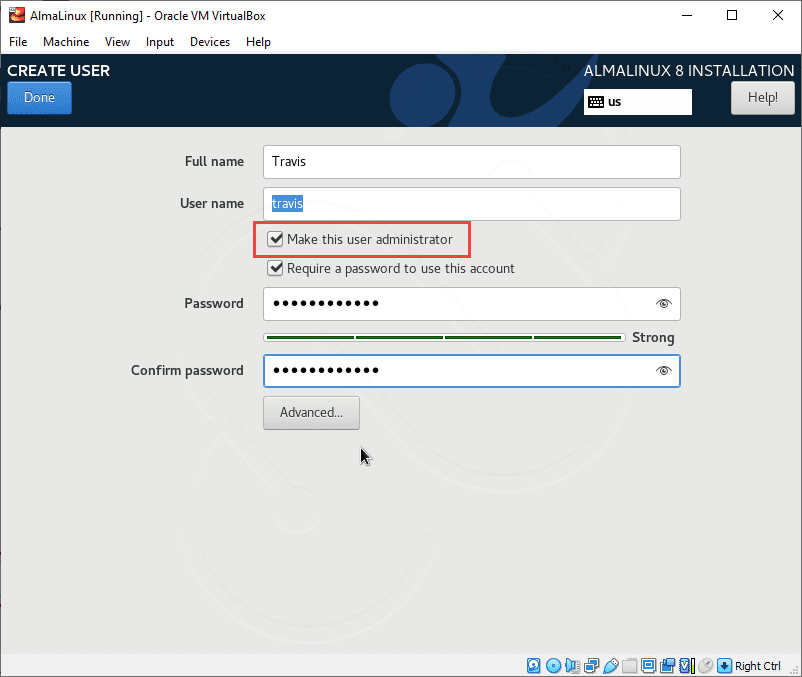
Finally, we want to create a user account for us. This account is going to be what we log into our server with and how we perform most administrative tasks. When we need to do something as the root user, we’re going to elevate our privileges and get permission to do whatever it is we’re doing. I’ll touch on this a little later. Make sure that you select Make this user administrator. You’ll again receive a password warning if your password isn’t a good choice. You can still use it, but you’ll have to press done twice to confirm. You won’t see the banner if your password is sufficiently safe to use.
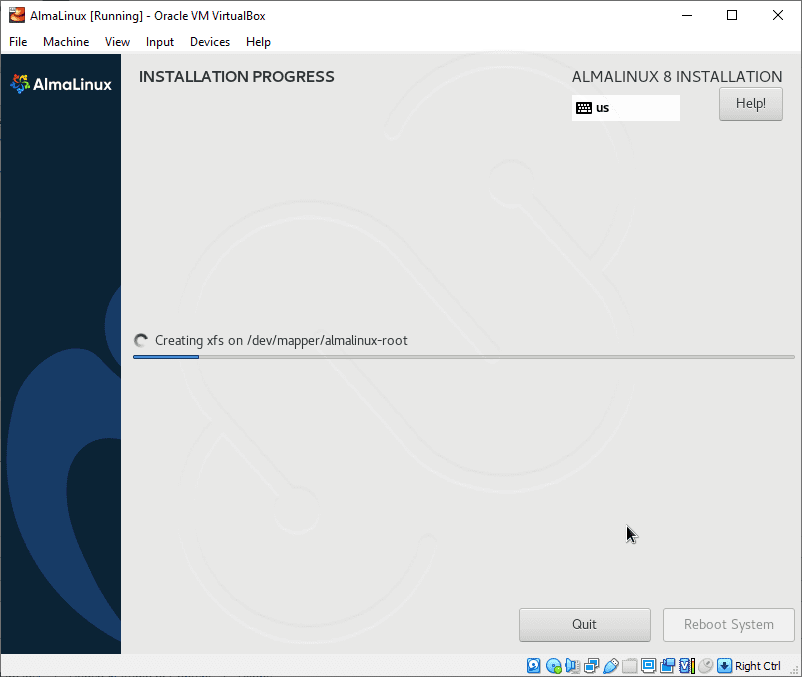
And that’s it! Installation will start! At the end, you’ll be asked to reboot the system. Just reboot your virtual machine by clicking on the reboot button in the AlmaLinux installer.
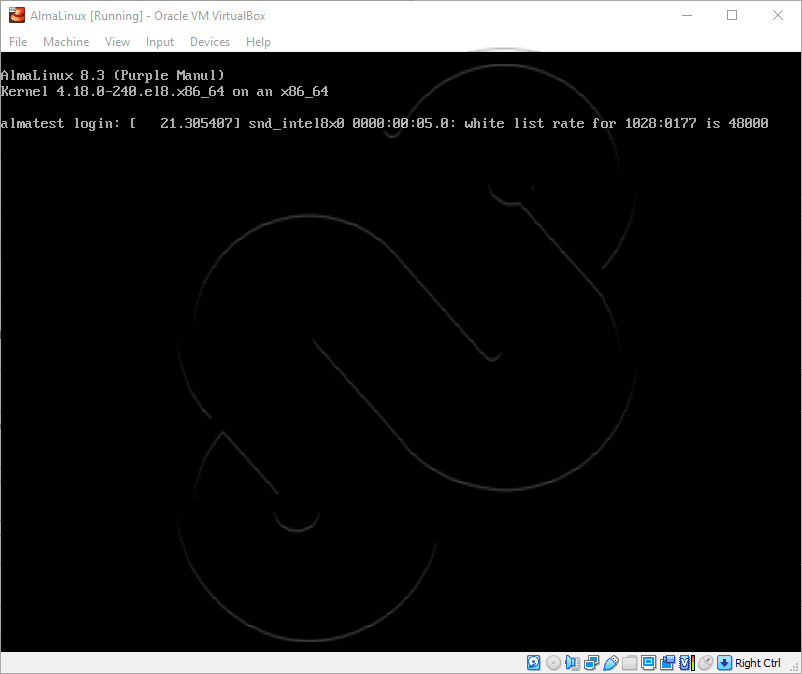
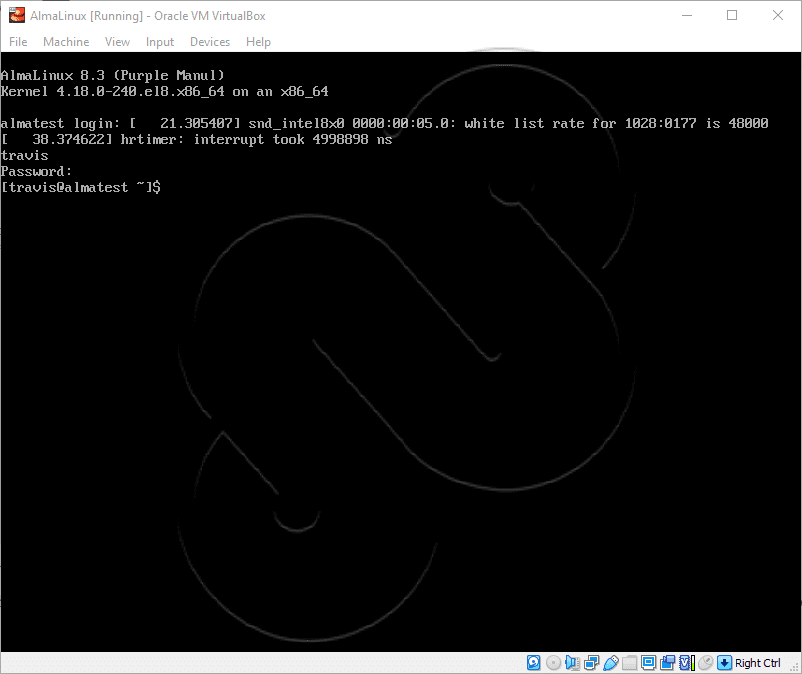
Once you see the login prompt (there might be some other text that will pop up and cover it, but you can still type), go ahead and login with the user you created. Just type your username and press enter. You’ll be prompted for your password. You won’t see your password or any indication that you’re typing. The cursor will just stay in place. Once you’ve typed your password, hit the enter key and notice your now logged in. You should see your username.
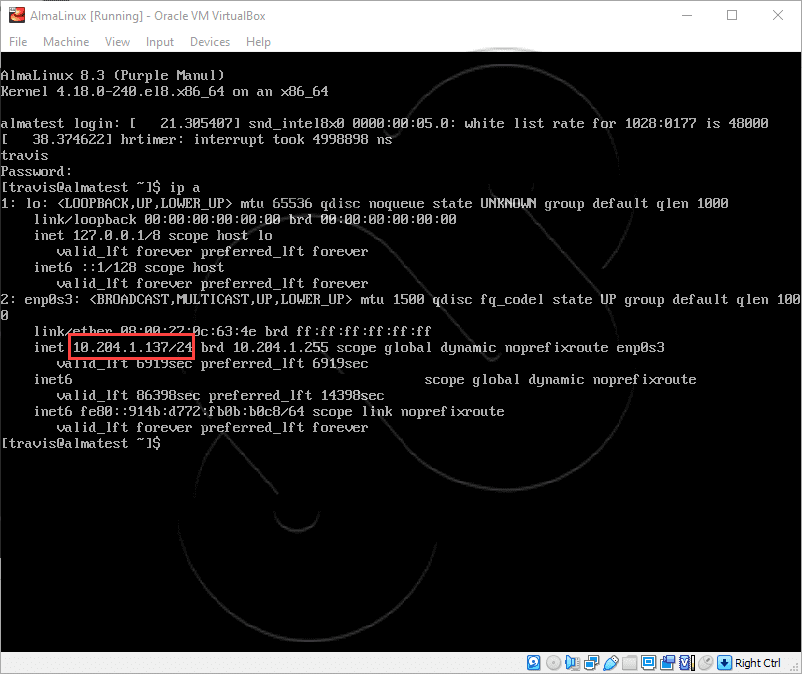
Now type the command:
ip a
and press enter.
Make a note of your IP address. I’ve highlighted where it should be in red. Keep in mind that this is my IP address. Yours will be different. Once you’ve made note of it, type exit, press the enter key, and you’ll be back at the login prompt. Press the right control key on your keyboard to release the mouse and then minimize the VirtualBox window.
We’re now going to start working with our system as if it was remote.
Working with AlmaLinux
If you’re on Windows, you’re going to need some software called PuTTY. You can download it from here. Install the MSI for your system. Once it’s installed, find the main PuTTY program and launch it. Type in the IP address of your AlmaLinux virtual machine. Keep the port as 22 and connection type as SSH.
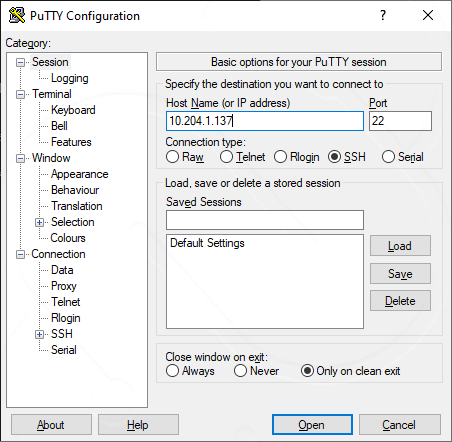
SSH stands for Secure SHell. SSH is a remote administration tool. It’s how you interact with a Linux server remotely. In a way, it is like Windows Remote Desktop but there’s no GUI to interact with. It’s all text. This is how Linux servers typically are. It allows the system to have more CPU and memory available for other applications and not a GUI that is rarely used. Click on the Open button.
You’re going to get a security warning.
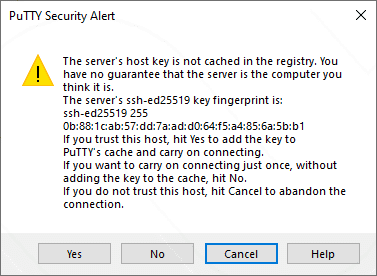
This is just telling you that PuTTY hasn’t seen this server before so it may not be the server you think it is. This is normal and will happen whenever you connect to a new server for the first time on your computer. Just click on Yes.
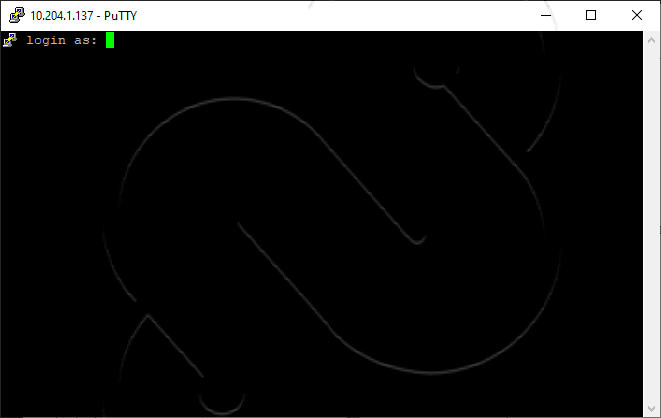
Now you can login like you did when you were at the console (what we call the VirtualBox window). Again, when you type in your user’s password, you won’t see the cursor move. It doesn’t look like you are typing, but you are.
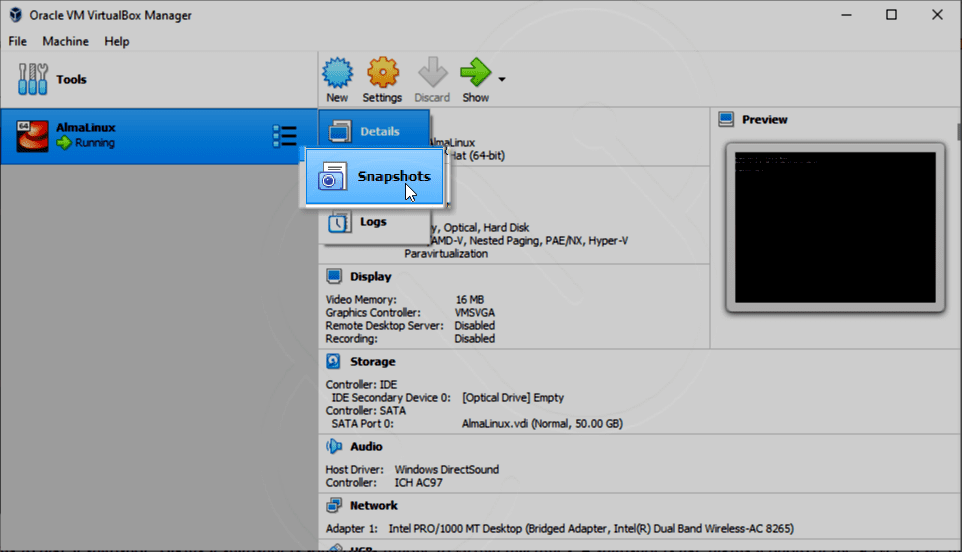
And now before we do anything, we’re going to take a snapshot. Taking a snapshot is something unique to virtual machines. A snapshot is like taking a photo of the server. If we mess something up, we can roll back to our snapshot and it’s like nothing ever happened. On the main VirtualBox window, click the 3 dots and lines next to your virtual machine. Select Snapshots.
Click on the Take button to take a new snapshot.
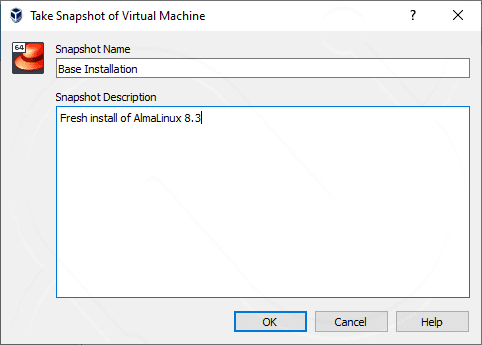
Give the snapshot a name. Since this is a clean install and we haven’t done anything yet, I call this “Base Installation” and then a short description.
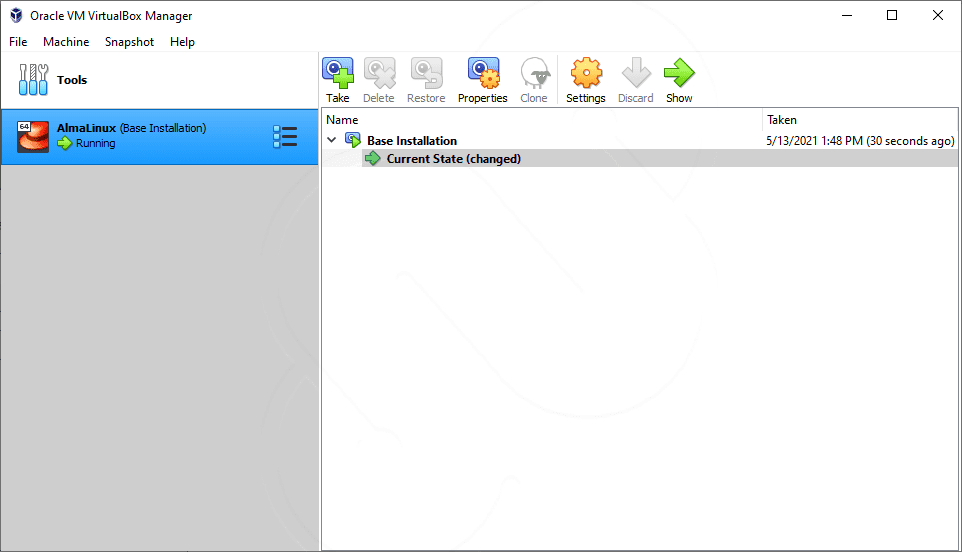
When you click on OK, a window will pop up and take a snapshot of the virtual machine. When it’s done, you’ll notice a snapshot in the list.
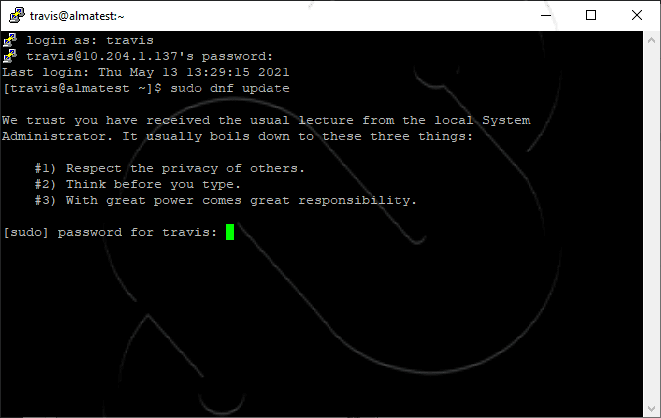
I always take snapshots before I do something major like install new software, make some large configuration changes, or even upgrade my system. Speaking of upgrades, let’s make sure we have all the latest updates. Back in PuTTY, type in the following command:
sudo dnf update
This will call the sudo application which allows us to run applications as the root user. dnf is an application that lets us install, remove, or upgrade our system and packages. Just like on Windows, you need to be an administrator to do this and that’s what sudo does. When you press enter, notice you receive a warning and are asked for your password. This warning is only shown the first time you attempt to use sudo and it is good advice!
Type your password and press enter. You’ll now see that we have some updates to install! The number of updates might vary, it’s all based on how old your ISO image was when you downloaded and installed AlmaLinux.

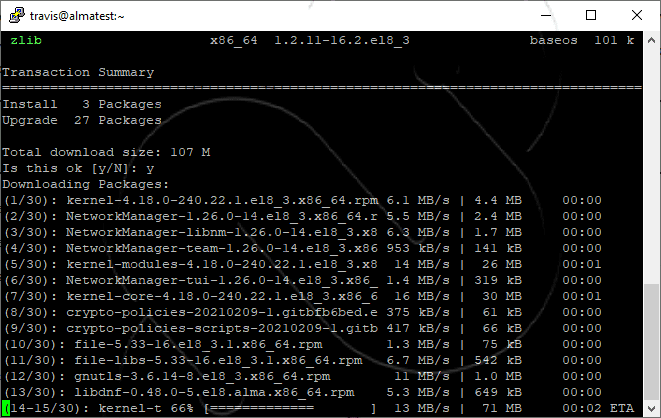
Press Y and enter. Packages will now start downloading and installing.
If you get a message about importing a GPG key, you can press Y and enter to accept it. You can always verify the GPG key through the AlmaLinux website. Once that completes, type in the command:
sudo reboot
and press enter. Some updates won’t automatically apply, such as new versions of the Linux Kernel, unless the system is rebooted. This command will reboot the system and boot into the new version of the Linux Kernel.
This is going to be the end of Part 1. In Part 2, we’re going to install some additional software and tools, and we’re going to learn how to setup a web server!
Review
In this lesson, you learned:
- What AlmaLinux is
- How to download AlmaLinux
- How to install AlmaLinux in a virtual machine on your local computer
- How to create a snapshot in VirtualBox and why you’d create a snapshot
- How to update AlmaLinux to ensure your system is patched